Thursday, 21 April 2016

YouTube channel and making videos

This week I've created a YouTube channel (thanks to encouragement form my previously mentioned wonderwoman friend!), so just a very short blog to tell you about it. So far I've uploaded videos of how I make a name necklace, which is the one piece that I get most questions about! This link should take you to Part I should you want to have a little look.

From this...


to this!


Wednesday, 13 April 2016

The making of a new idea - 'Love' necklace

I've set myself a task. Apart form blogging every week (so far so good) I'm also coming up with a new idea every week. I'm not completely crazy - the new idea doesn't have to become a finished piece, but I thought it might be good for me. So last week I made a fresh set of wire cards, from idea on Monday, to sent off to printers on Thursday! Not too shabby. Available in my etsy shop.


So this week I had an idea to do a new 'Love' necklace in a slightly different style of handlettering to my usual. This is how I started, with some sketching in front of the telly (couldn't find a black pen for love nor money!)


The next morning I redrew my favourite a few times, and then inked it in on tracing paper.

This morning I unwrapped my new toy (a phone tripod - ridiculously excited with my £6.39 spend) and started filming the process.


Before I start, I have made the silver matt by using a scratcher on the surface. Then the tracing paper is stuck in place, and I drill holes into the little internal areas that need cutting away, like the inside of the 'o' and 'v'. This means that I can thread the saw blade into the hole and cut away these little bits. Once that's done I go around the whole edge, and then, ta-dah!

Now I will file the edges, solder on the chain and polish it. Then there's the dull part...Photographing, writing blurb and uploading the whole thing! Can you tell I prefer the first part of the whole new idea thing?!

Thursday, 7 April 2016

Making cards, or trying to make more from what I've already got!


Alongside my jewellery business, I started making wire 'drawings' last summer. These have developed into a full blown passion, and I've made far more than I've sold (oops!). Here are some recent ones...


This last one is a commission which was really nice to do.
I've also turned them into 'bouquets' in vintage glass bottles.

All this is great fun, and if it could be a hobby then that would be fine, but I want to make too many of them. To actually cost them with any kind of accuracy means that I'm essentially paying myself the minimum wage! So recently I made a set of cards, and realised that they are selling well in my etsy shop and my real bricks and mortar shop in Bristol. 


So over the last few days I've made another set. I start with rough pencil sketches of ideas, which I then make in wire. 


Once I've decided on the objects, I make the colour, which is freehand machine embroidery on to soluble fabric. This is how they look when I've washed away the fabric. 


Then I stick the 'colour' to the wire, and cut away the excess. Having tried all manner of glues, I've come down to good old fashioned Uhu! It sticks fairly quickly, but not too fast, doesn't stick your fingers to everything in sight, and dries completely clear.

Once they are ready I position them and photograph them. This takes ages - so tricky to get the light right! Now that they are photographed I'm going to mount them and I'm hoping they will become two or even three framed pictures, so at least I'm making a few more pence out of them, once they've sold!

So there you go - all sent off, and now waiting for Monday when they arrive and I'll photograph them again and get them in the shop. Watch this space!

Wednesday, 30 March 2016

Photographing Silver Jewellery (by an amateur!)

For years I have had all my jewellery photographed by my friend and marvellous photographer Clare, but for several reasons I've had to learn to do it myself. One reason is speed - the big advantage to doing it myself is that I can have an idea in the morning, make it by lunchtime, photograph it in the afternoon and get it online in the evening. In theory at least!


I'm lucky that my husband, a furniture maker, has much of the photography equipment that would cost me rather a lot to have to invest in, and all I've had to buy myself is a macro lens. And that was a small fortune even secondhand, but boy, has it made a difference!

So here's my list of what I use to photograph my work.

Position - A corner of our bedroom, that has lots of light, but no direct sunlight - very important as you don't want glare from direct light. It's also nice to work at a decent height, rather than having to crouch down!


Tripod(s) - I have two tripods, though sometimes I don't use one for the camera, but the light was fading this afternoon, so I did set up the camera tripod.

Flash - On the light tripod, you'll see I don't have an actual light! This was a tip my husband discovered before buying a big light. Instead he bought a remote control - one part is situated on the tripod, and the flash is fitted on top, and the other part on top of the camera. This means you can control the direction and strength of the flash, not have it directly in front of the object you are photographing, and infill with light where you want - perhaps behind the object so that the background isn't too dark.

Umbrella - for directing the flashlight back more softly.

Camera - it's a digital SLR. Again, second hand, bought separately from the lenses. I know people swear by their phone cameras, but really nothing beats a decent SLR.

I know next to nothing on the technical side, but my husband distilled it for me - roughly the 'natural look' is 1/125 shutter speed, 5.6 aperture, and film speed 100 or 200. From there I move up and down (mainly the shutter speed) depending on the amount of light. I find that if I can get it looking as clean and bright as possible, I don't need to play around in photoshop with the image. The first shot, and the one below has had no digital tinkering. Both have been cropped a little, but no other manipulation at all.


Tuesday, 22 March 2016

'Where do you get your ideas from?'

I'm occasionally asked this question, and sometimes I've no idea, but now and then it's an easy question to answer. One of my resolutions this month (and beyond!) is to blog more frequently, and another is to create a new item at least once a week. Hopefully these things will be good enough, or lead to something good enough, to make more to sell.


So yesterday I got out my sketch book and then started looking at my instagram feed. And first up was a new print by Eloise Renouf, whose work I love. And from that starting point, I started sketching a few ideas using some of the shapes and combinations that she has used in the print.


This morning, once I'd finished off some orders, I started making a couple of rough versions of two of the sketches. The idea is that they will eventually be made from gold and silver, but naturally I'm starting with all silver versions.


This is the top part of the earrings with the post and a tiny jump ring attached to the reverse, and the lower parts before I cut them out.


Then I popped a ring through the hole at the top of the shapes and threaded this through the other ring, and soldered it closed. Finally I polish the top part to a mirror finish and the dangling shapes are matt.


Tuesday, 15 March 2016

The magic of soluble fabric and freemotion embroidery

An actual finished item. A single bed crochet
blanket (only took one whole year to make)
I love hobbies - I've got lots, but I've got even more UFO's (unfinished objects for all the people who when they start something actually finish them too). Looking around me now there's a big basket which I know contains an unfinished quilt, a bit of old fashioned patchwork (suppose to be a cushion cover) and a failed attempt at knitting a cushion (I really can't knit). There's a smaller basket with several crochet projects on the go, and next to me is a square of Tunisian crochet which I'm currently trying to teach myself. With limited success.

Strangely when something goes well, I tend to make loads of it and then get bored, so I'm hoping that my enjoyment of freehand machine embroidery doesn't wane just yet. I've made flowers, both framed and in vases using iron wire, and you can see some in an old post and my instagram page, but the last few weeks I've been making beetles... quite solid ones, like patches you'd sew on your jeans when I was a kid in the 70's. I start by tracing my drawing on to soluble fabric (amazing, magical stuff!), and then I make an outline on the machine using a 'bouncing foot'.


Then I start 'colouring in ' with all the different thread colours, until it's really quite solid. 


Once the fabric is washed away under hot water, and left to dry, I mount the beetle on tiny pins, and pop it in a frame - ta-dah!


Friday, 11 March 2016

Musings of a 'full-time' craftsperson

This week was supposed to be a 'good' week - in that there weren't to be too many other things going on. In the last few weeks I have taught a 1:1 workshop, been to parents evening (in the afternoon), gone to solicitors meeting, taken kids to dentist/rehearsals/work, volunteered and worked shifts at my shop Fig on the Gloucester Road. Phew. So I'd been looking forward to a heads down, proper working week.

Well so much for that idea. Anyway, in the middle of various family 'jobs' (over and above all the standard ones) I had a power-brunch with a dear friend and fellow full-time working-from-homer (AND she's finishing off a degree) and general all round wonder-woman. We meet infrequently but we are good at motivating each other to do something, something we 'need' to do for work or a more personal need. I have promised to blog more often (yes, more than once a year!) and schedule it into my week (her idea!). So this got me thinking about scheduling and squeezing a ridiculous amount of stuff into my week.

So although I haven't had as much quality work time this week as I would have liked, I looked back at my instagram feed and realised that I have achieved and finished a few things this week that were on the mental tick list.


I finally noticed that all but one of my wire flower bouquets had sold in fig so I found time to make four new ones.
These tiny little earrings are one of three new designs that have been roaming around my head for a month or two. Available to buy on Etsy.


And these two pictures were finally mounted and framed in the middle of the week, and even photographed in the smattering of sunshine that we've had in Bristol. I did also get all my orders out, but the to-do list is still there, just a little shorter. But now I can tell Ms Power Brunch, that I've actually blogged! Hurray!

Wednesday, 8 July 2015

New opportunities, new work

This last month I have been working on some new 'products' - I was shoved (though not rudely!) in this direction by the rather inspirational Abby at Prema Arts in Uley. She contacted me and asked if I'd be interested in teaching a short course at the arts centre. Well, it would be rude to say no wouldn't it?! In my old life as a graphic designer, I used to go into art colleges and speak about the type of life they could expect as a children's book illustrator, and occasionally set projects... hardly teaching but I knew I enjoyed what I did back then.

Prema Arts at Uley - gorgeous!

So Abby suggested not just a course, but also a workshop. My real love in  jewellery making is piercing - or cutting out is the easiest way to think of it. I love doing a drawing and then making the drawing out of metal. So the course is fairly easy, in a way, as it the students will have time to design and make their own piece of jewellery, using piercing techniques. This is an example of my piercing work....

Available here

Outside of jewellery making what I adore and collect to some degree, is papercutting. Rob Ryan has long been my hero, and I have a few pieces of his brilliant work. So for the one day workshop, Abby and I talked over a simple idea that combines these passions. I also love to embroider and use freehand machine sewing techniques to create simple 'pieces' usually based on my simple flower sketches. And so something entirely new has emerged from Jemima Lumley HQ.


The one above is made from copper which I've textured, and stands about 11cm high. It sold to a very dear customer before it even got to the shop in Bristol! I've also been making simpler versions, with just one plant featured. You can see these on my Facebook or Instagram pages, and there'll be professional photos soon. They are available to buy if you contact me directly. For now they are one offs, approximately 15cm high, including the wooden block (which is oak or cherry) and cost between £45-£65. Some of the single flowers are made from this lovely weathered copper, which isn't cheap, and being someone who hates waste, has set me off on a reusing path, and here are the current results. 


Fuchsia earrings made from both types of copper, brass, and various bits and bobs! £30-£40 with sterling silver ear wires. All the copper, for both the earrings and the plant ornaments are lacquered so the copper won't change colour.


Sunday, 7 June 2015

Wedding Jewels

I love this time of year, when I get to make rather special jewellery. Here's a set destined for a bride to be, and her groom, getting hitched at the end of the month. 


The necklace and bangle are based on some vintage lace that I've had for 20 years, and go perfectly with her dress also made with vintage lace. 


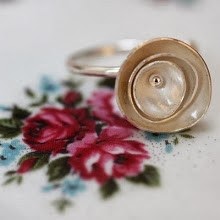
The ring is white gold and silver wire wrapped together. At the front there are three small leaves in both metals. 

The funny thing is, when my customer called to ask if I'd design her a ring, with a few sketchy ideas, I made a rough in silver. When she arrived not only did she declare the design 'exactly what I wanted', it also fitted her perfectly! I'd never met her before, so had no idea what size her finger might be.

Then she asked if I'd design a necklace and bracelet, again giving me just and idea of the type of bracelet she was after. I made her what you see in the photo - without knowing what her dress was made of...spooky!  

Love - ain't it just grand!


Thursday, 9 April 2015

Preparing for a Craft Fair

Or how to stress yourself out!

I haven't done any craft fairs for several years. When I first started making jewellery, I did lots of them, but gradually I fell out of love with them. Finding the right fair for my work was very tricky. I did quite well at Christmas shopping evenings at local schools, Art Trails worked, but I found that small, inexpensive craft fairs were a complete failure for me. So I made a decision to stop doing them and concentrate on selling my work online.

Until a couple of months ago! I reversed that decision and decided that I needed more direct sales, cutting out the middleman, and an opportunity was presented to me. So I signed up for Outlaw in Bristol on the 2nd and 3rd of May. And then I panicked! Oh my word, I had forgotten how much work there is to do in preparation - and this is an all weekender so double the organisation, the stock, the manpower.... gulp!


So, two checklists (one for things to do beforehand, and one for the day), one HUGE spreadsheet (and a whiteboard!), and many extra hours of work, and I feel that I've broken the back of it! Here's the stock box, looking fairly full.


But the funny thing is, when under pressure I often get rather creative, and instead of sticking to The List, I go off piste. This time I found old sketch book and while leafing through it I found an old design and realised it would be perfect as a centrepiece at the fair. But mainly I just desperately wanted to make it again! Here it is modelled by my gorgeous daughter....


And now, back to the list....

Monday, 9 March 2015

Gold Plating Jewellery

For a long time now, I've been asked to make many of my most popular items in gold, but boy are people surprised when they find out how much it will cost! To give you an idea, my single knot bangle uses 280mm of 2mm silver wire, costing around £10. The same in gold? Almost £150! So you can imagine by the time I've done the work, added the cost of hallmarking and my general overheads,  p&p, there is a huge difference in the price.


So the lovely Lucy from Lily Charmed recommended a local gold plating company. I had always thought that you had send it all off to the Far East and have a huge number of items plated, but it turns out that this isn't the only option. So I sent off some of my best sellers, to a company not five miles from my workshop and had them dipped in 24ct gold. 

I went to pick them up myself as I was fascinated to find out how it was done. Having learnt just about nothing in Science at school, and only a couple of days of electroplating at college, I took the opportunity to have a good nose, and try to understand a little of what goes on. It was surprisingly old school and I loved my tour, but not as much aI love the results!


And for the gentlemen in your life, there's some cufflinks too.


You can find them all on my website now.